


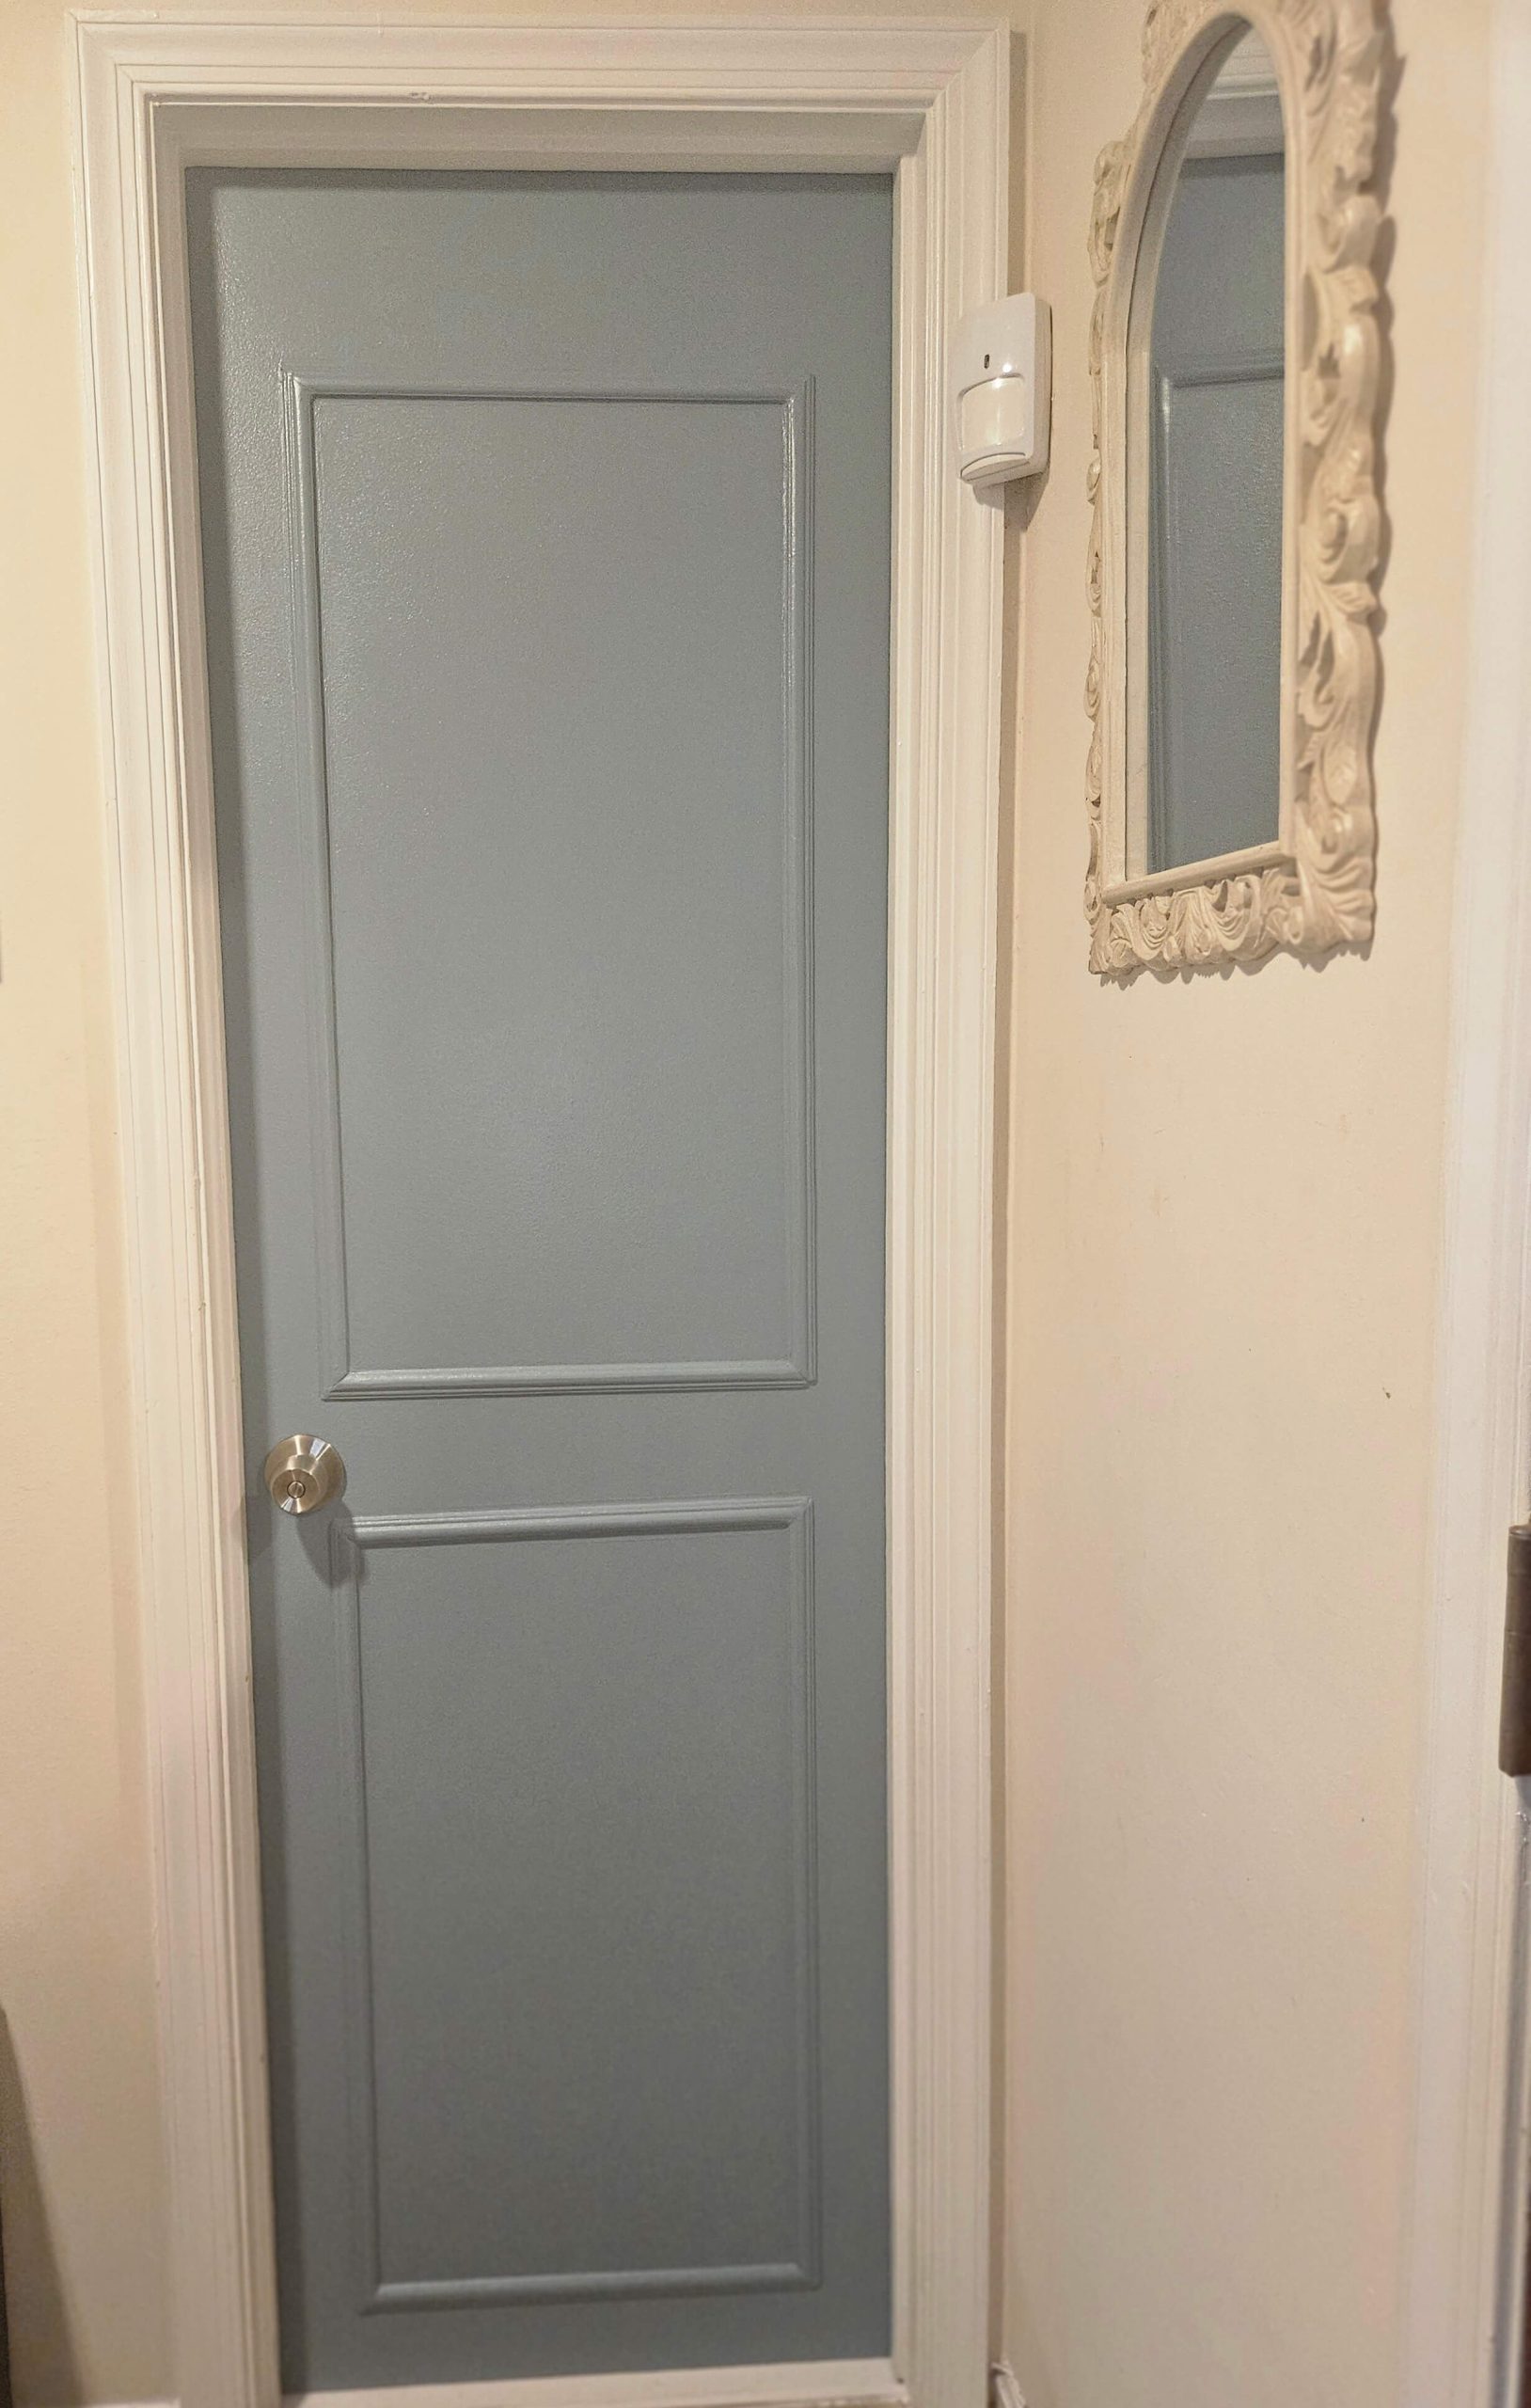
I’ve been wanting to paint and update all our 1970’s hollow core doors to a modern style for years. Unfortunately, it just kept getting deprioritized. It is one of the projects that will make a big impact on the look and the feel of a house. It would certainly de-escalate the Arnold and Helga love/hate tussle me and this house have been in since we bought it lol. Updating the door to our powder room confirmed that for me.
It came out beautifully and the thought of this being throughout the house made me feel warm and lovey dovey about this house. Funny story: the plan was to update the interior side of the door so I could do a big reveal of the bathroom update for the One Room Challenge. But as we say in Jamaica ‘when man a plan, God a wipe’. Translation: sometimes your plans won’t work out the way you wanted, because God has something else in store. Keep reading if you want to know what had Joel and I both shocked, laughing and disappointed and proud all in one go.
Needed:
- Brad Nailer. I bought one for this project. A cheaper alternative: some persons use liquid nails
- Decarom trim. I used a total of 5 for both sides. Cheaper alternative: I will be stalking Habitat for Humanity Restores for trim moving forward because they add up!$$
- Miter shears and a miter box (These are inexpensive and can do the job, but a miter saw is better. More on that later)
- Power sander
- Wood filler
- Acrylic caulk
- Primer
- Semi-gloss paint
Here’s how I tackled it:
- We used a drill and a hammer to remove the door and hinge from the frame. A genius once existed and decided to paint the hinge, nails etc. It made it difficult to remove the screws. Don’t be like that genius. Don’t paint nails while it’s screwed into a hinge.
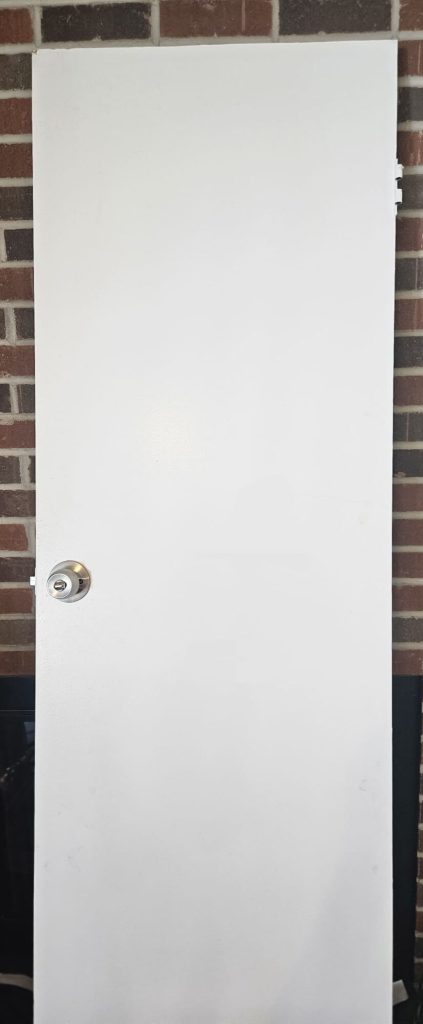
- If you’re like us and some jobs sit longer than you’d like to admit, make sure you mark with a pencil the interior/exterior and top of the door ** Skipping this step caused a major mishap for us. More on that later
- I laid the doors flat on our saw horse and used a pencil to trace where the trim would go. We decided on the design and the measurements we wanted to go with (3inches down from the top, 6 inches up from the bottom of the door, 3 inches from the sides and 2.5 inches from the middle of the door knob to the bottom of the first box and same distance to the top of the second box) – see below:

- Here’s where things got frustrating for us. We cut the trim with the miter box & miter shears. It was not easy. I held the trim steady then my husband started sawing it. It took a lot of effort to cut through it. There were times when we had to follow up with the miter shear. Miter saws are expensive, so if you can’t afford one you can try this method, but just know it can be frustrating and will take longer. I personally am manifesting a miter saw in the near future. Please share this blog, so your girl can get a saw!
We also found that we could never get the corners right. There were to meet at 45 degree angles to form 90, but it was always a little off for us. There was always a gap. Do save yourself the trouble and questioning of your formal education and just accept that you can caulk the corners and it will be fine. For really bad gaps, wood filler! - We then attached the trims with the brad nailer. That was a learning curve. If it’s your first time, I would pay attention to the depth of the nails and the door. Then test 1 nail to make sure it doesn’t go to the other end of the door or doesn’t stick up too much. You want a tiny gap between the nail’s head and the trim, so that it can be filled with wood filler and have a flat and clean finish. No bumps.
- I sanded the door and trims with the power sander, then wiped it down with a tack cloth. Sanding is an important step to ensure the paint adheres to the door
- Caulked the 90 degree corners with acrylic caulk and wherever the trim met the door. Do this on the inside & outside the trim
- After the caulk cured (read the instructions for best curing time), we primed the door and trim. Don’t skip this step.
- Lightly sanded everything again. I read that this helps the paint to adhere better. I did it just in case because I wanted the best outcome
- Painted with semi-gloss paint. We did 2 coats
We love how it turned out! Except for that big mishap I mentioned….
**Here’s where it got fun for us. The door was off for months (maybe a year) and we didn’t mark the bathroom vs foyer side of the door. We checked which side we were painting the door according to where the knob was. Sounds simple, right? Weeelllll. When we went to reattach the door, we realized what we also forgot to check….where the hinge lines up with the door. Because we didn’t do that, we painted the Blue Jeans color on the wrong side AND the door was upside down. Phew. We just went with the punches and decided it was a design choice that we won’t be changing. We had to flip the door around and over, so now our renovated bathroom has an unfinished door to go with it. The foyer did get an unexpected update. Ha! DIY is not for the weak. It will test you. So be easy on yourself.
Could you tell that the trim layout wasn’t quite right? Drop a comment below and let me know!