

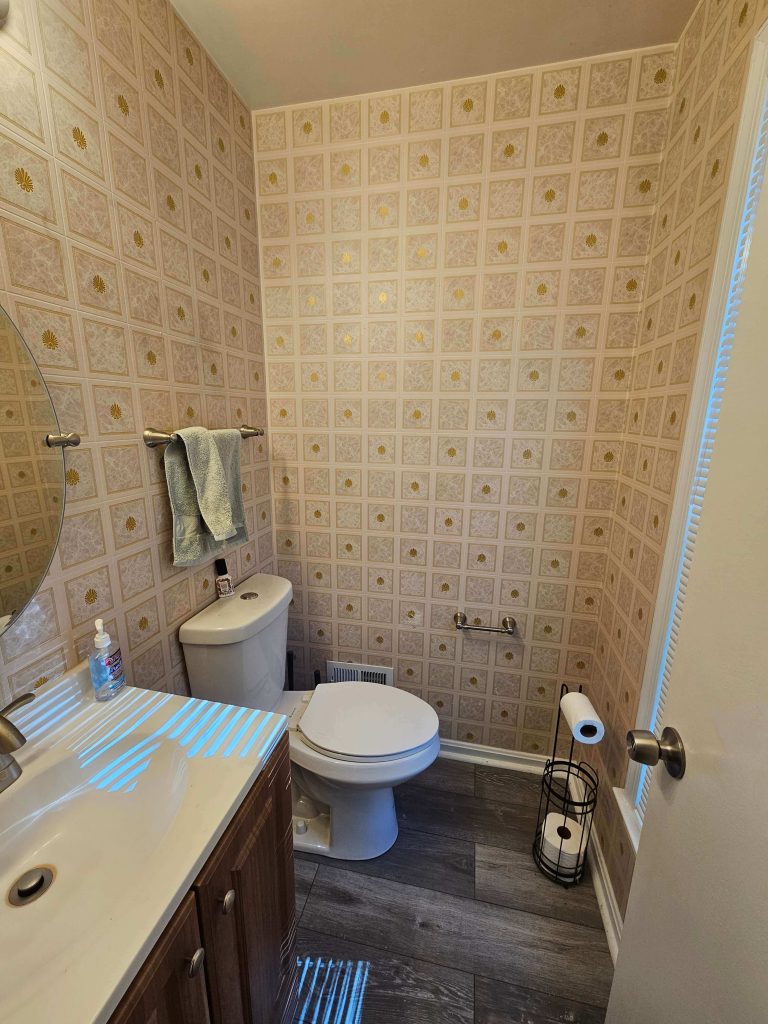
We moved into our 1970s house in 2021 and one of the rooms that was NOT one of the reasons we put in an offer, was our half bathroom. The fixtures were all builder grade and the 1970’s wallpaper was old, had obvious water damage to it and it had a granny feel that wasn’t the granny chic vibe that I LOVE. It had to go. This proved to be harder than we expected. So my fit of “I must do it now at 1 am” didn’t do anything but leave half ripped paper on the wall.

Lesson 1 of DIY: Don’t start a project with a fit of rage at 1 am with no plan. This ripped section stayed like that for months. Haunting me. Smh.
I was born cheap because my father is cheap. Biology 101. Genetics. So when we began the process of removing our wallpaper, I wanted to utilize hacks on the internet that did not require us buying a new tool or product. I also didn’t want to use chemicals because I’m crunchy-lite. If I can avoid chemicals in my home, I will.
Here are methods that I tried and how well they worked:
Removing it by hand:
See previous picture. Rolls eyes. This method appears to work well for newer peel and stick wallpapers. However, the backing (which is the hardest part to remove) stayed intact for this old paper. However, doing this step was necessary even though it didn’t remove the whole thing.
It is a necessary step 1 for all the other methods as well.
Spraying warm water & soap:
This required a lot of water to soak it into the paper. When it did, I tried scraping it off but it would just crumble into smaller pieces. I soon realized I would lose my hand trying to tackle the whole bathroom this way. I abandoned it. This could work for a smaller space.
Spraying warm water & fabric softener
This had a similar effect (or lack thereof) as the soapy water. I abandoned this one even quicker.
Wallpaper Steamer
This was the one! This did it! I reluctantly rented a wallpaper steamer from my local hardware store and it gave me hope that I could get this wretched paper off. I put on a good Afrobeats playlist and got to work. It was hard on my wrists but I enjoyed it and found it satisfying to FINALLY get the wallpaper off.

Here’s what I would suggest if you’re getting ready to remove an old wallpaper
- Rent the steamer at a time when you can start the job right away. There’s a slight learning curve and you’ll need a fair amount of time. You don’t want to have to pay for extra time.
- If you have a wallpaper filled house that you’d like to tackle, do the math and decide if it makes more sense to buy a steamer. Depending on how long you’ll take to tackle the rooms, a purchase might make more sense for you
- Protect your floors and fixtures with a tarp or protective paper. I didn’t do this and pulled bits of wallpaper out for dayyyys.
- Test out how long it takes to penetrate the walls for the wallpaper to come off easily. If it doesn’t come off easily when you scrape it, put the steamer back into place and try again for a few more seconds. You don’t want to have it steaming up the wall for too long either. You still need to protect the walls from water damage
- You’ll need a putty knife to scrape the backing off after steaming. I used a plastic one.
- The room will get HOT, so stay hydrated and take short breaks. This is imperative for your hands as well because holding up the steamer and putty knife while scraping is hard on your wrists
- Give the wall a day to fully dry.
I can’t recommend using a power sander enough. I bought one for this project and it was a lot of fun for me and sped up the process tremendously. I recommend hooking up your sander to your shop vac to reduce your exposure to dust from the wallpaper and the walls. Don’t overdo it, because again the walls are to be protected. Once you’ve gotten the paper residue off, you can patch up any necessary areas, sand again, and repeat, if necessary and then get ready to paint.
I had to do a fair amount of sanding because some parts of the backing were left behind. I honestly started doubting that these walls would ever look normal and started willing myself into accepting textured walls via wallpaper backing. Priming the walls is a must. I recommend 2 coats.
Look at the difference that one coat of primer did! I was still nervous though.
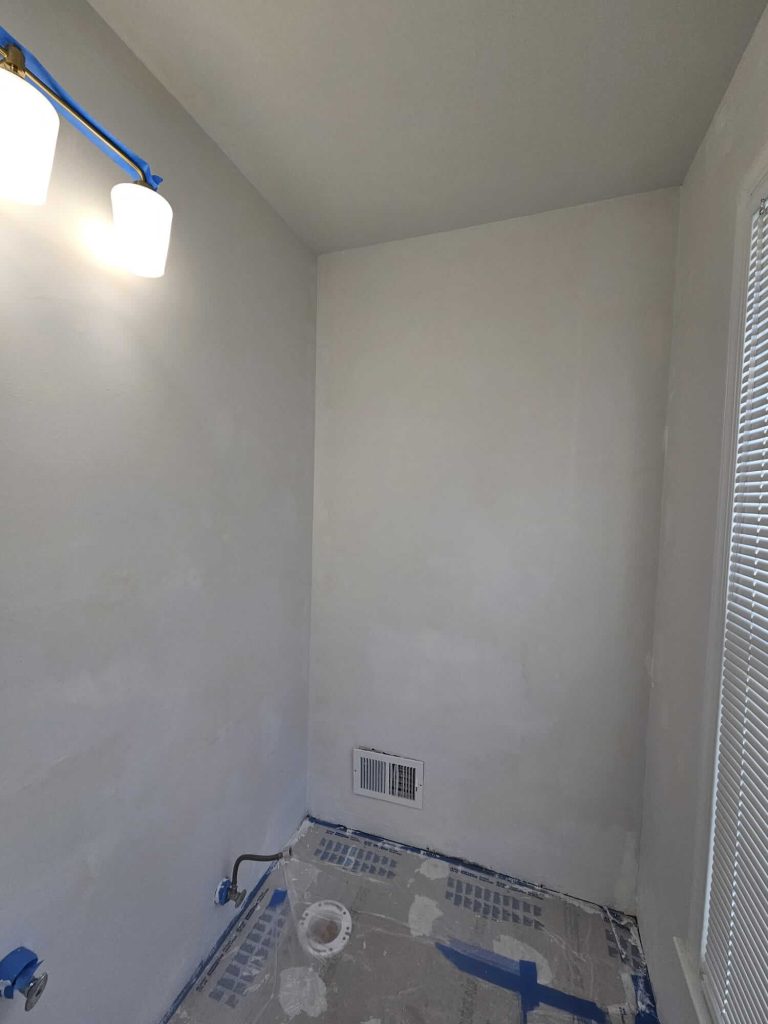

I’ve never been prouder of my work because I didn’t think we could get it looking normal. Patches of wallpaper backing were still peaking out even after we sanded it, but I knew I couldn’t keep sanding it down to oblivion, so I trusted the process and primed it. Thankfully, priming alone did the trick. We loved it so much we thought about keeping the primer as the paint lol, but we decided to go full steam ahead in our Good Jeans color. It was my first time trying Clare Paint and baybeeee. Yes! Highly recommend.
